Git and GitHub Actions🚀

What is git?
Git is a free and Open Source version control system (VCS), a technology used to track older versions of files, providing the ability to roll back and maintain separate different versions at the same time.
Git is a successor of SVN and CVS, two very popular version control systems of the past. First developed by Linus Torvalds (the creator of Linux), today is the go-to system that you can’t avoid if you make use of Open Source software.
GitHub is a website that hosts billions of lines of code, and it’s where millions of developers gather every day to collaborate on and report issues with open-source software.
In short, it’s a platform for software developers, and it’s built around Git.
As a developer, you can’t avoid using GitHub or another Git-based tool on a daily basis as part of your work. It’s used to either host your code or to collaborate on other people’s code. This article explains some key concepts of GitHub, and how to use some of its features to improve your workflow.
Why GitHub?
Now that you know what GitHub is, you might ask why you should use it.
GitHub, after all, is managed by a private company, which profits from hosting people’s code. So why should you use that instead of similar platforms such as BitBucket or GitLab?
Beside personal preferences and technical reasons, there is one big reason: everyone uses GitHub, so the network effect is huge.
Major codebases have migrated over time from other version control systems to Git because of its convenience, and GitHub has been historically well positioned and put in a lot of effort to serve the needs of the Open Source community.
So today, any time you look up some library, you will 99% of the time find it on GitHub.
Apart from Open Source code, many developers also host private repositories on GitHub because of the convenience of the platform.
Now let's get started on the important Git-specific concepts that a developer needs to know.
How to create CI/CD pipeline using Github Actions?
Github announced that Github Actions now has support for CI/CD. What this means is that developers can now start using GitHub Actions to create a CI/CD pipeline. In this tutorial, we are going to build a CI/CD pipeline using Github Actions, the pipeline will deploy a react app to Heroku.
Github Action is still in beta, for you to have access to it you need to signup for the beta program.
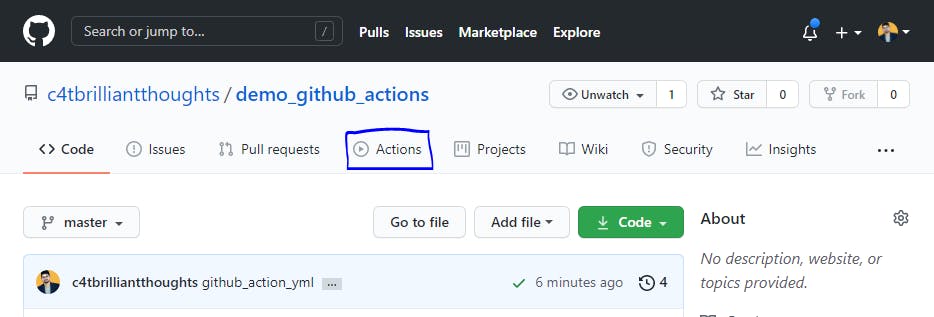
If Actions has been activated on your account you will see the actions tab appear on your repo👇.
Installization setup 🛠⚙️
The first thing we have to do is to create our react project, we are using create-react-app
Open your terminal🖥 and run below command with app name demo_github_actions 👇
Copy
npx create-react-app demo_github_actions
From the command above demo_github_actions will be the folder name for our react app project.
- Open your project on your code editor 👨💻
- Create a repository on GitHub 📁
- Add the git remote origin to your project 📕
Copy
git remote add origin https://github.com/c4tbrilliantthoughts/demo_github_actions.git
Perfect🎉👊🏻, Once done these all steps successfully😀
The next step is to create our Actions (workflow)
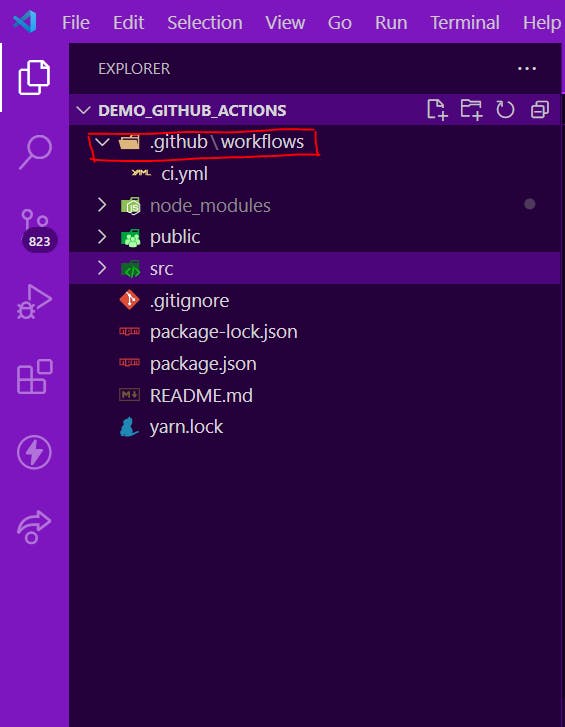
The action must be created inside a .github/workflow/ folder for it to be accessible by Github
- To create the folder structure, run the command below inside the root of your project directory
Create a new folder GitHub inside the project
Copy
mkdir .github/
Then create inside GitHub folder workflows
Copy
mkdir .github/workflows/
Your folder structure should look like this
Next, let's create our workflow files inside the workflows folder, this file should be a yml file
Copy
touch .github/workflows/ci.yml
This will create a file call ci.yml inside your workflows folder, the name of this file is up to you, you can give this file any name but just make sure that it ends with .yml
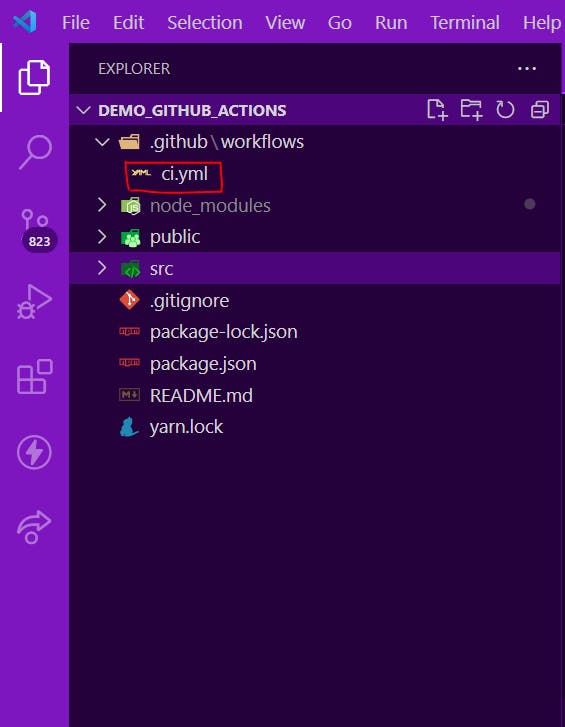
Open the ci.yml file and paste the code snippet below
Copy
name: CI

on: [push]

jobs:
  build:

    runs-on: ubuntu-latest

    steps:
    - uses: actions/checkout@v1
    - name: Run a one-line script
      run: echo Hello, world!
    - name: Run a multi-line script
      run: |
        echo Add other actions to build,
        echo test, and deploy your project.
Let's explains what each of the lines does
name: CI
This is just specifying a name for the workflow
on: [push]
The on command is used to specify an event that will trigger the workflow, this event can be push, pull_request, etc. It can also be an array of events like this.
Copy
# Use an array when using more than one event
on: [push, pull_request]
In our case, we are simply saying trigger this workflow on every push
jobs:
Here we are specifying the job we want to run, in this case, we are setting up a build job.
runs-on: ubuntu-latest
The runs-on is specifying the OS you want your workflow to run on and we are using the latest version of ubuntu or windows
Steps:
Steps just indicate the various steps you want to run on that job
uses: actions/checkout@v1
Github has some already define Actions, we are using version 1 of the checkout action this is responsible for cloning the repo and checking into our project directory. The other steps just show how to run one or more commands in the shell. the default shell is bash.
Let's test our workflow
Run the commands below to push your code to GitHub
Copy
1. git add .
2. git commit -m "Add workflow file"
3. git push origin -u master
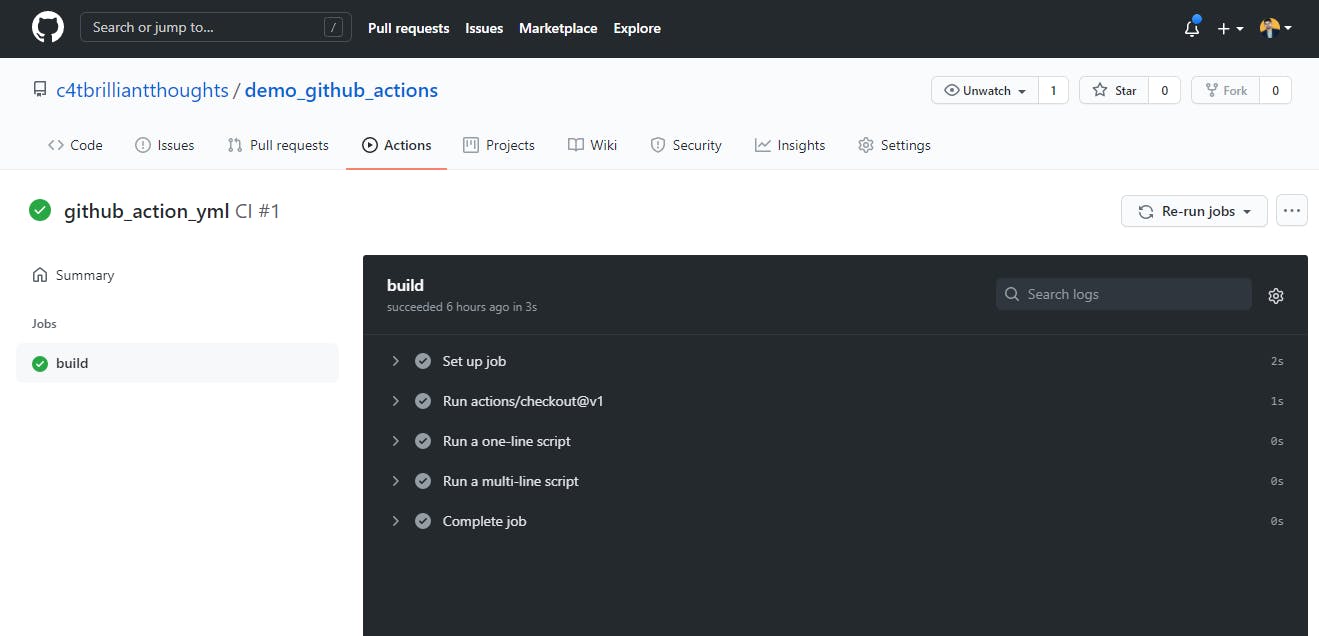
Hmm!😀 Finally, we are pushed our local code to the GitHub repo. After commit and push code to the repo, the CI job start automatically ✈️.
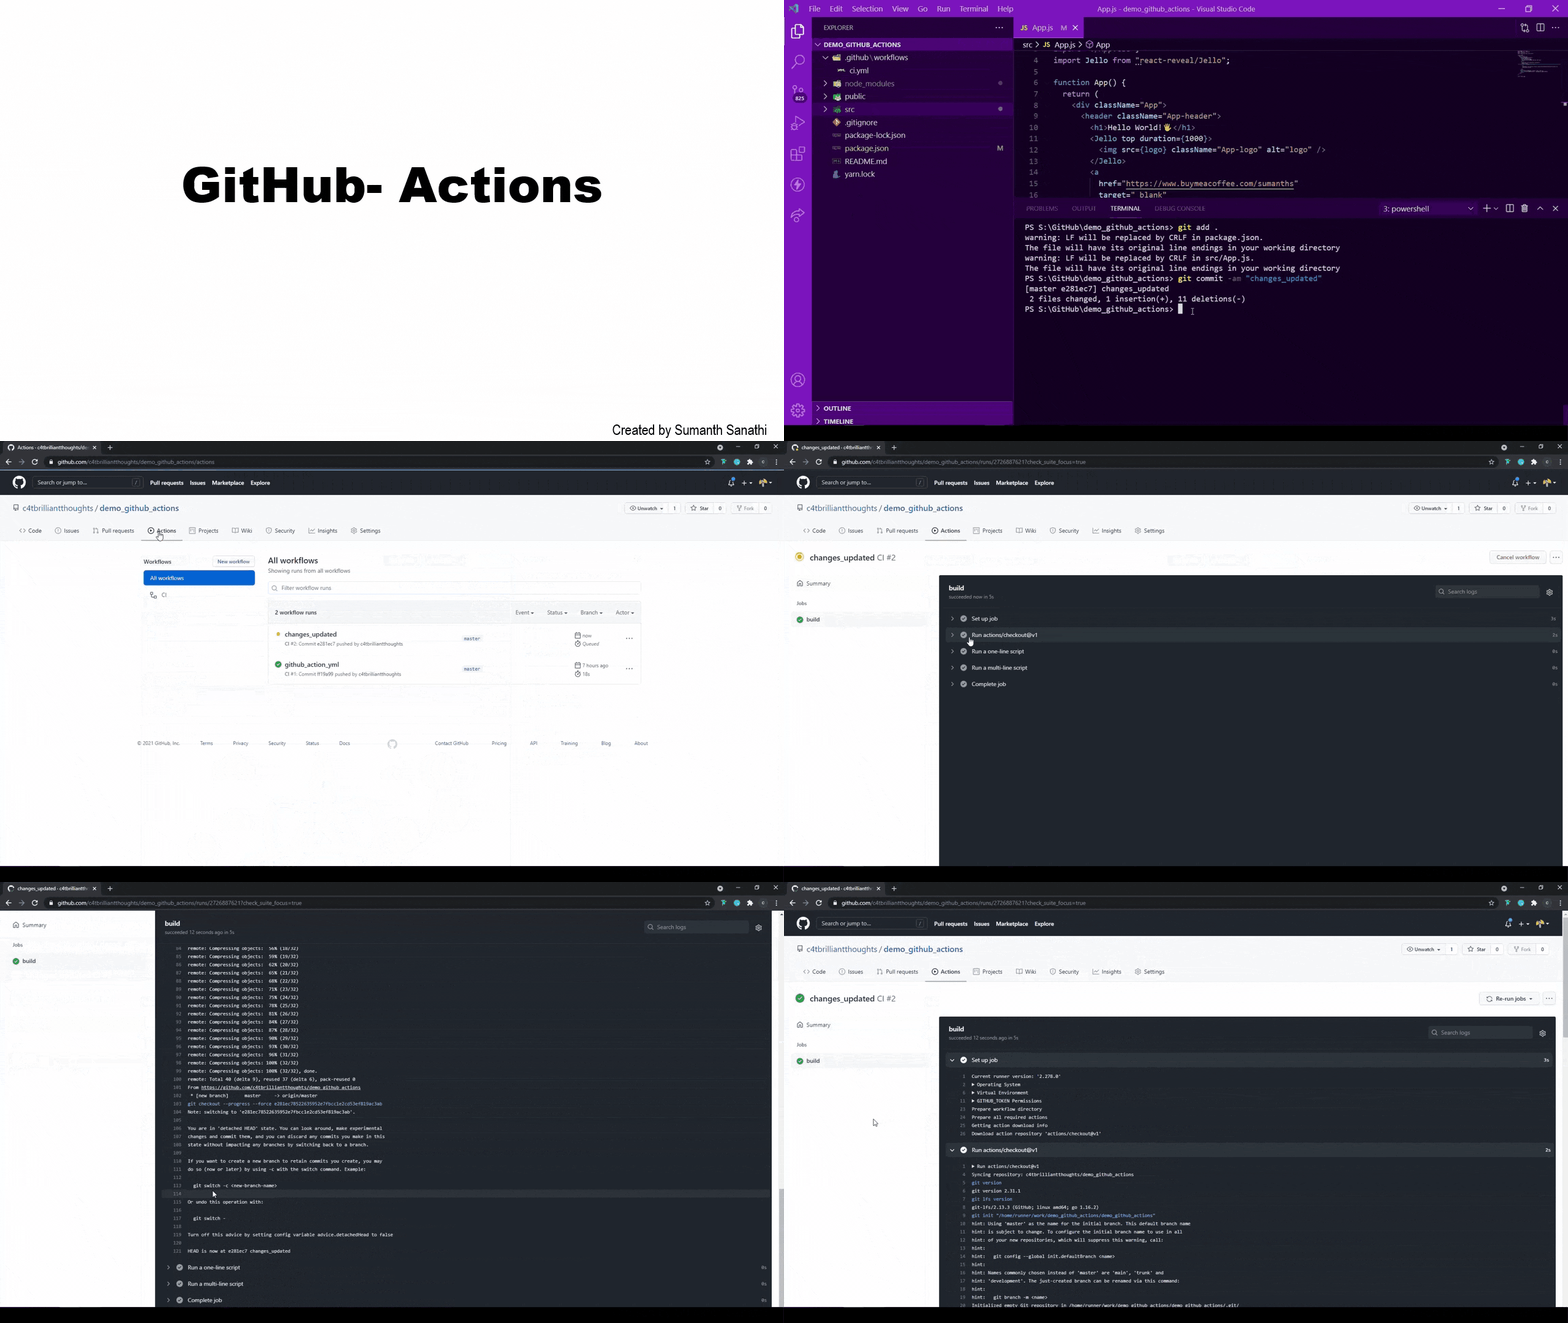
That's all for this article now
Hope you like the article. Stay Tuned for more.
📘 This article was originally posted on the LCO (LearnCodeOnline) blog.
⚠️ Since LCO has been discontinued, the original blog posts are no longer available there.
🔁 Therefore, I’ve re-posted my articles from the old (now defunct) LCO blog onto my CodeHouse website 💻.
✨ You can now find my original article from the LCO website re-published on my Code